How to Overlay Videos Like a Pro Videographer
Combining two videos into one and playing them at the same time is called the picture-in-picture effect. Such a montaging trick could be useful if you need to make a tutorial for your colleagues or customers. It helps demonstrate things that happen on your screen and your face at the same time. This makes your tutorial more interactive and personal. The same goes for such entertainment formats as game reviews and walkthroughs and reaction videos that need viewers to feel involved.
This fancy-looking montage technique is actually super easy. In this guide, we will teach you how to overlay a video on a video by yourself. So once you’re through, you will be able to make awesome virtual duets, interview videos, and sync reviews for video platforms and social media.
Want to see what the picture-in-picture effect looks like in practice? Or are you a visual learner? Check out our YouTube tutorial on how to put a video inside a video.

You can easily make a similar montage or even better in SmartSHOW 3D. This video slideshow maker is equipped with everything necessary: layer-based editing, tools for mixing sound, a library of music, and tons of artistic elements like animation, transitions, masks, frames, cliparts, and text styles. Besides, the program has an intuitive interface, so even a newbie will be able to quickly make a video overlay in it.
Want to get to know SmartSHOW 3D better? Try it for free today and see what it has for you.
Need a hand to make your first video on video overlay in SmartSHOW 3D? Check out our tutorial and get started on your project shortly after!
How to Overlay Videos in a Jiff
Step 1 - Open Your Background Video
Run SmartSHOW 3D and choose New Project. Then, go to the Add tab and select Photo & Videos. Find the video you want to be in the background and drag and drop it to the timeline. Click Edit Slide to go to the custom animation module.

Step 2 - Overlay a Video Over Another
Select Add Layer, click Video and open your second video. Adjust its size and find the right place for it. If you go to the Layer tab, you can apply more modifications to the smaller video: cut it, adjust its sound, mute it, and add a mask or a reflection to it. Once the two videos look good together, hit the Save button.

Step 3 - Add Sound to Your Montage
Switch to the Music tab. There you can either choose a song from the program’s collection, add a soundtrack of your own, or your prerecorded voiceover. If you click Synchronize, your music will sync with your video. You can also employ the audio points technique to turn your audio up or down to add emphasis to particular moments.

Step 4 - Save Your Montage
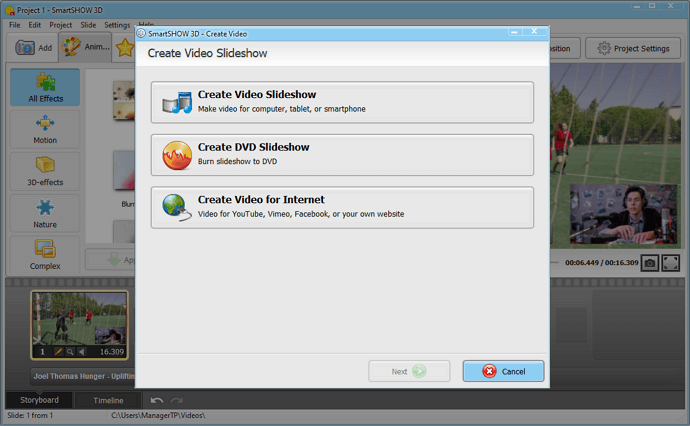
Now that you are through with your video overlay, click Create Video and choose the output option. You can create a video for YouTube, burn it to DVD, or save it on your PC in 50+ other formats: Full HD, AVI, MKV, MP4, MOV, MPG, and more. There are also special formats for sharing your video on different kinds of TVs and smartphones.

Now that you are through the tutorial, you can see how easy it is to put a video on top of another video in SmartSHOW 3D. But that is not the only advantage of the program. It is equipped with 400+ artistic elements like transitions, cliparts, text styles, and animations. Those will help you make your montage look even cooler. The software also has a library of music in case you want to accompany your project with a soundtrack.
If you are someone who likes editing on the go as well, check out the Android app for overlaying videos and stay productive even when your PC isn’t around. And in case you are a big fan of advanced Adobe programs, get your hands on Premiere Rush. It is the perfect video editing program for professionals. But no matter the method you choose, we hope that this guide was helpful for you.
Do that with SmartSHOW 3D and get a pro result in an instant!


