HOW TO CREATE SLIDESHOW ANIMATION IN A MINUTE
The world of slideshows is a booming formation which gathers under one umbrella professional photographers and committed enthusiasts. As an ever-developing field, it provides users with advanced tools and techniques to combine photos, music and video clips in thrilling animated slideshows. The whole “fusion” concept is not new, but it is steadily drawing more and more people to the world of slideshow creativity.

With SmartSHOW 3D slideshow software, mixing photos, videos, music and titles is easier than ever. Plus, you get more opportunities for spicing up your digital creation with tons of special effects and animations. In this article, you’ll learn how to apply pre-designed effects to your photos and videos, and create your own animation in SmartSHOW 3D with no hassle at all.
For a start, click the button below and get a free trial version of SmartSHOW 3D!
Once you’ve installed the program, run it on your computer, add your photos, and go ahead with setting slideshow animation.
How to Create an Animated Slideshow Step by Step
Don’t know where to start? Luckily, this animated slideshow software is absolutely easy to master and will provide you with all the necessary tools. Here’re a few useful tips on creating your effects-powered presentation.
Step 1 – Combine Photos and Videos
First of all, start a new project and switch to the Photos & Videos tab. Now you can select suitable pictures and video clips and insert them into your animated slideshow along with images. Basically, there are two ways to do it. Either add a video clip to the Storyboard in the same manner as you do with ordinary photos, or create a blank slide and paste the video there as a new layer. Regardless of the chosen technique, you will get the same result and will be able to customize it to your own liking.
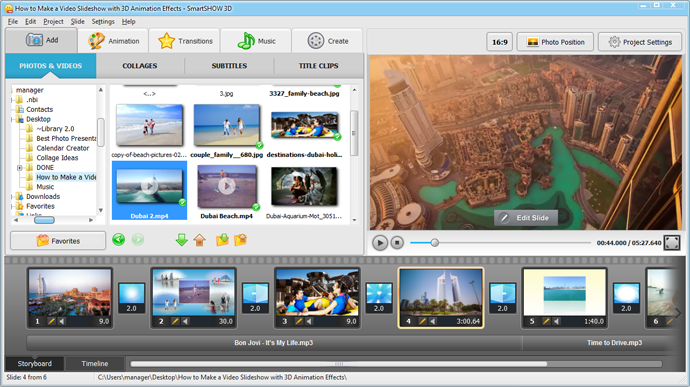
Step 2 – Try Pre-Designed Animation Effects
Can’t wait to animate your slideshow? The quickest way to funk up your photo presentation is to use pre-designed effects. Switch to the Animation tab and pick the effect you like from one of such categories like Motion, 3D-Effects, Nature and Complex. With their help, you can make photos on your slides gradually appear and dissolve, fly around, split in two, create optical illusions, try different colors, and much more. This animation slideshow maker has no trouble changing digital seasons with such effects as falling leaves, dancing snowflakes or lifting fog.
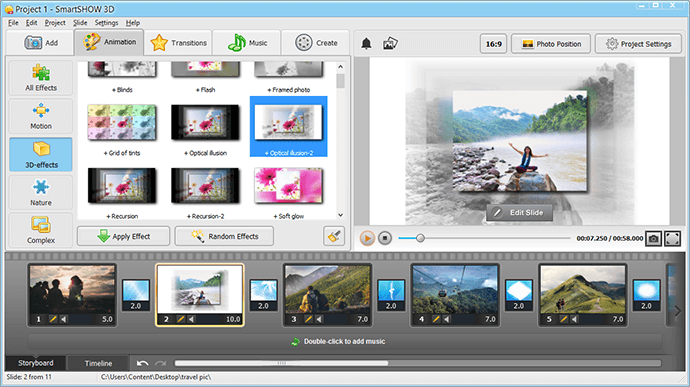
Step 3 – Bring in Some Light to Your Slideshow
Photo slideshow animation in SmartSHOW 3D isn’t limited to ready-made effects so you can set your hands and imagination loose. Want to accentuate particular objects and regions of your photo or video clip? Add various glows and flares! Click Edit Slide > Add Layer > Highlights and textures. There you’ll find original highlights, colored and vintage textures. All you need to do is to pick a suitable glow effect and add it to the slide. To make them more dynamic, use keyframes and change the intensity and position of the chosen glow effect.
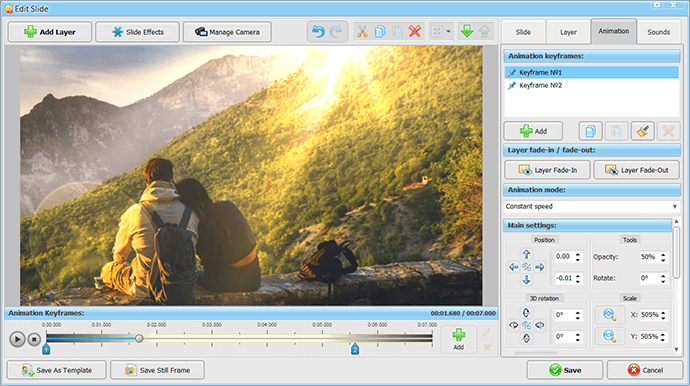
Step 4 - Make Unique Animation Effects Using Mask Layers
One more type of slideshow animations you should try in your project is mask animation. While in the slide editor, click Add Layer > Mask Layer and choose a shape to your liking. It can be a classic rectangular, elegant oval, heart or bubble. Apply it to one of your pictures and let the magic happen. A single photo can appear on the slide in a peculiar shape, two photos can change one another through the chosen shape, or mask animation can send multiple photos moving across the slide and changing their size. What’s more, you can apply mask layers not only to photos but also to video clips, text captions and even embellishments!
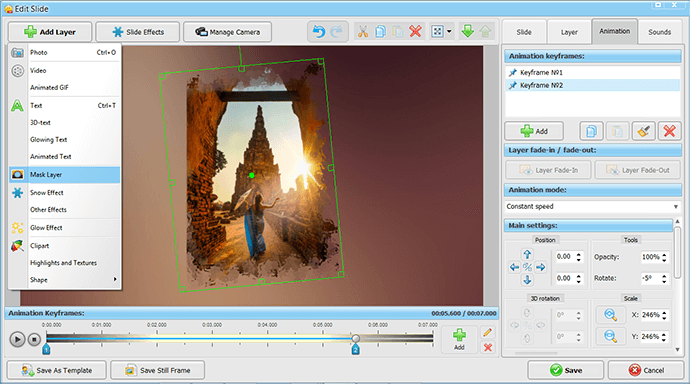
Step 5 – Set Fade-In and Fade-Out Effects
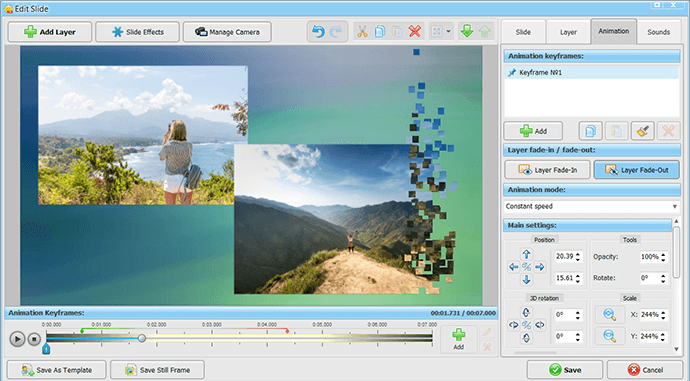
Using fade-in and fade-out effects, you can also make your photos appear on the slide in a more grasping manner and disappear as if they were blown away or broken into separate pixels. The program offers you plenty of effects divided into three categories Standard, Gradient and Particles. Open the slide editor and move to the Animation tab. Click Layer Fade-In or Layer Fade-Out to jazz up your animated slide with more effects. For example, switch layers by breaking them into different pieces or make a new photo emerge from a swirl. After all, it’s up to you to set the most suitable animation.
Funking up your slideshow with animation is a brilliant way to add a bright spark into your storytelling and recreate a 3D effect without putting on special glasses. This step-by-step guide has given you some basic tips on how to use animation, so open up new avenues of creativity and amaze everyone with your breathtaking animated slideshows!
Start now with SmartSHOW 3D!


