Slideshow Zoom Effect - 5 Professional Tricks
Zooming is one of the most demanded special effects in slideshow making. It is a perfect way to attract the viewers’ attention to a particular region of a slide. Both Zoom In and Out look stylish and boost your slideshow quality whether you use it in a slow or dynamic photo presentation. To apply various zoom effects to a slide you’ll need animated slideshow software. SmartSHOW 3D suits perfectly - it’s a flexible program that offers a wide collection of ready-made presets for newbies and allows skilled users to create their own spectacular slideshow zoom effects. From the guide below, you will learn 5 awesome tricks on how to do that like a professional.
Contents:
Want to impress your viewers with stunning zoom effects? Create your slideshow with SmartSHOW 3D! Download the trial version for free now:
Now let's see how you can create different types of zoom in SmartSHOW 3D.
1. Classic Zoom
Select the slide you want to zoom on the Storyboard. Click the Edit slide button to work on the slide. For the background, use a solid/gradient color or a texture, there’s quite a choice of them in software. Also, you can choose an image from the built-in gallery or your own photo.
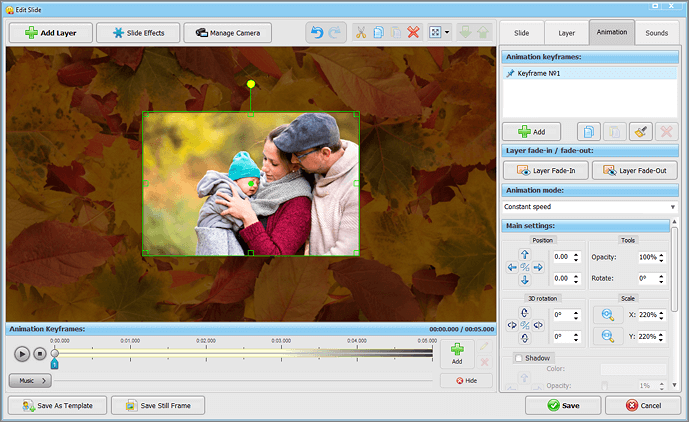
Click the photo and minimize it with the help of control handles by dragging one of them in. Move to the Animation tab and add Keyframe #2 to the Animation Keyframes timeline. For a slow zoom in, place the keyframe closer to the timeline end. If you put it near the start, you’ll get a quick slideshow zoom effect.
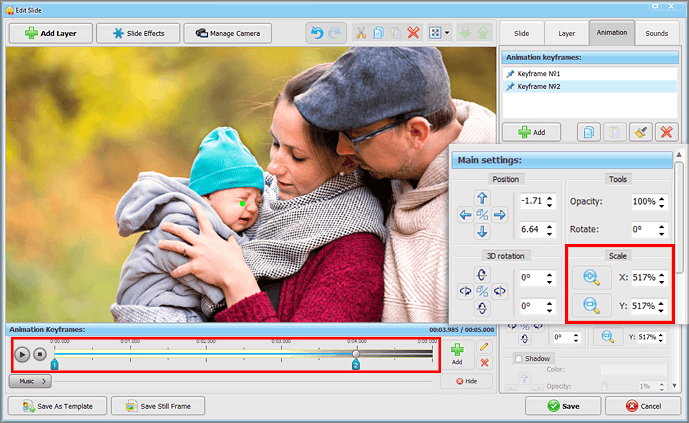
To zoom the photo in, increase its size by dragging the control handle out or scale it up in the main animation settings.
2. Zoom & 3D-flip
Click on your photo layer to select it, switch to the Animation tab and add several keyframes. Note that the most suitable distance between 2 keyframes on the timeline is up to 2 seconds in our case. So, you will need to add 5-6 keyframes for a 10-second slide to create a smooth slideshow zoom effect.
For keyframe #2, set 3D rotation at 90°. Change the 3D rotation to 180° for keyframe #3 and increase the size of your photo. Adjust the rotation degree and scale settings in the same way for other keyframes.
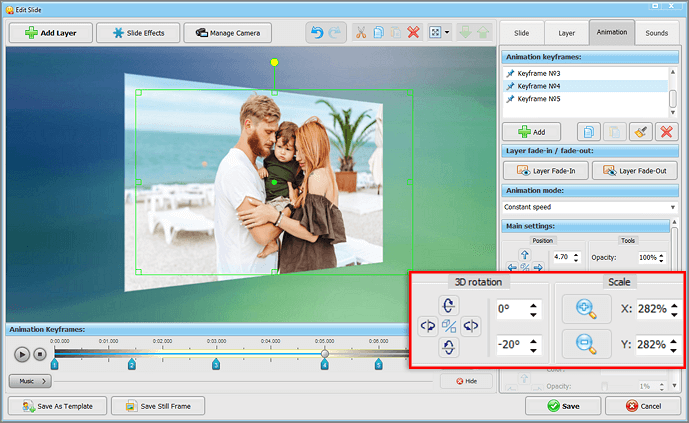
Click the Play button and preview the animation in the slide editor – your photo makes a double horizontal or vertical flip and gets zoomed in.
3. Background Zoom-Out
To make this slideshow zoom effect more dramatic, use your photo as the slide background. In the slide editor, click the Add Layer button, select Photo and pick the image from your computer. In the Layer tab, click the Photo Filters button and edit your photo. Decrease its brightness, contrast and saturation levels, and add some blurriness. That will help to make the background less noticeable so it doesn’t distract the viewers’ eyes from the main photo.
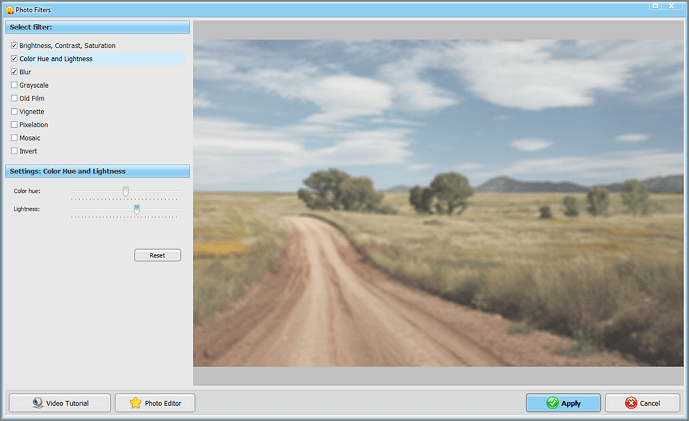
Next, stretch the background image beyond the slide borders. In the Animation tab, add keyframe #2 and decrease the Scale degree a few times. Add the same photo as a new layer and set its animation just in the same way as for the Classic Zoom effect.
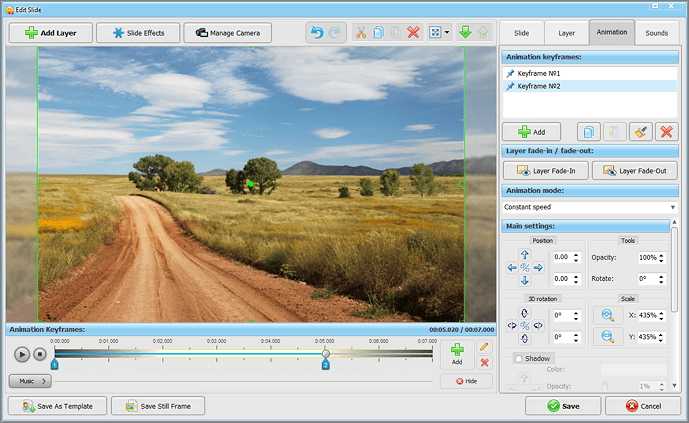
4. Picture-in-Picture Zoom
This effect is really stunning because of the 3D-camera effect used in it. To begin with, choose the zoom effect for your main photo. It can be classic zoom, pan and zoom also known as Ken Burns slideshow effect, 3D-flip zoom or a combination of those. Set the animation in the way described above or apply one of the animation presets to your image.
Now, click the Manage Camera button at the top of the slide editor. Add keyframe #2 in the middle of the timeline without changing any of its settings. For a 3D camera to start moving, add keyframe #3 and drag the zoom slider to the right.
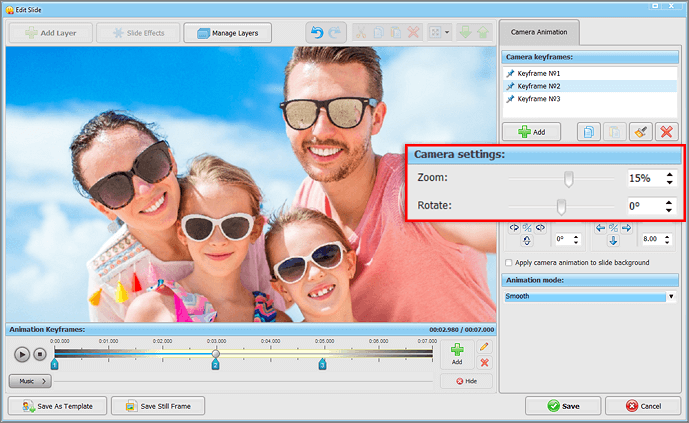
5. Two Make One
Now it’s time to try creating an absolutely eye-popping slideshow zoom effect and you’ll learn at first hand that SmartSHOW 3D editing possibilities are really impressive!
Add a photo as the background and apply photo filters to it - adjust its brightness and saturation and add some blurriness. Add the same picture as a new layer and animate it. Choose the zoom effect you like, add keyframes to the timeline and adjust the main settings such as position, 3D rotation and scale in the Animation tab.
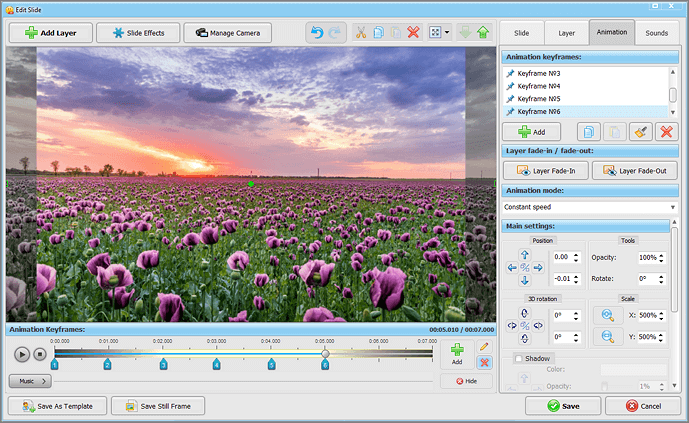
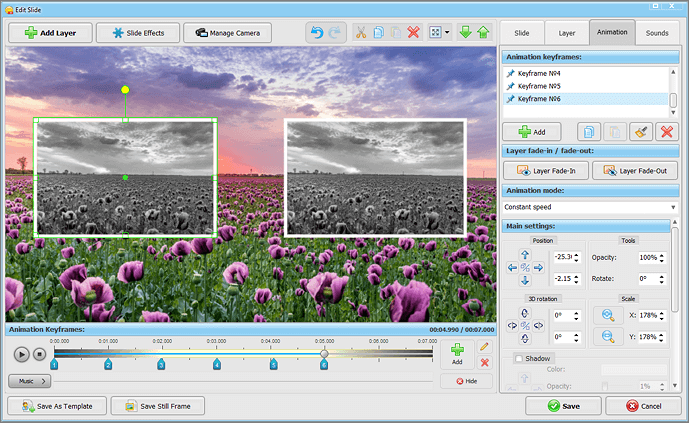
Right-click the photo and duplicate it twice. The animation settings will be copied for these 2 layers. Place one copy to the other side of the slide. For a creative look, select the Grayscale filter for them. Next, set the opacity level of the original animated photo at 0% for all the keyframes #1, #2, #3 and #4.
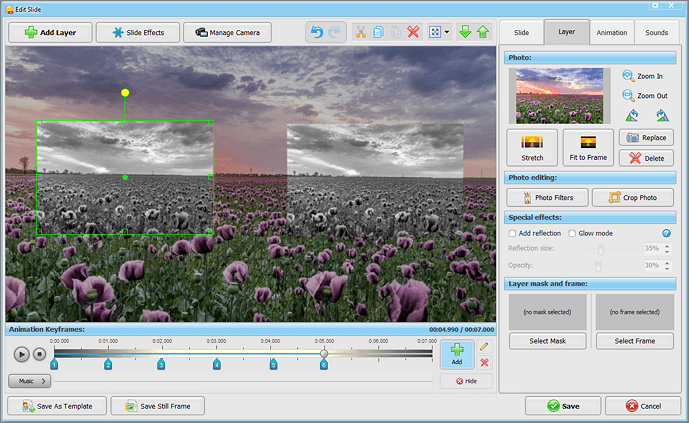
Preview the slideshow zoom effect - as a result, two black-and-white photos move in sync, make a color image and get zoomed.
With powerful slideshow software, everyone can make breath-taking slideshows, this work will turn into plenty of pleasure and you’ll feel proud seeing the result. You only need your photos, suitable music and your creativity - and you are ready to make a movie from still images to share with the world! Download SmartSHOW 3D and start creating amazing slideshows right now!
Create it with SmartSHOW 3D!


