Space Slideshow - All You Need to Make One
Want to create a space slideshow? Need a video with realistic photos and scientific quotes for your studies? Or a simple presentation with interesting facts and quizzes for your kids? In both cases, you will need a bunch of cool-looking photos, futuristic music and a powerful program.
However, where to start? You don’t have to waste precious time searching the Internet and trying out every trick, advice and software. Instead of that, get yourself a cup of tea and read this article. Discover a simple way of making a space photo slideshow together with a step-by-step guide.
Let’s start with getting some inspiration and gathering ideas you can use in your own projects. Watch the video below to see the true beauty of the Universe:
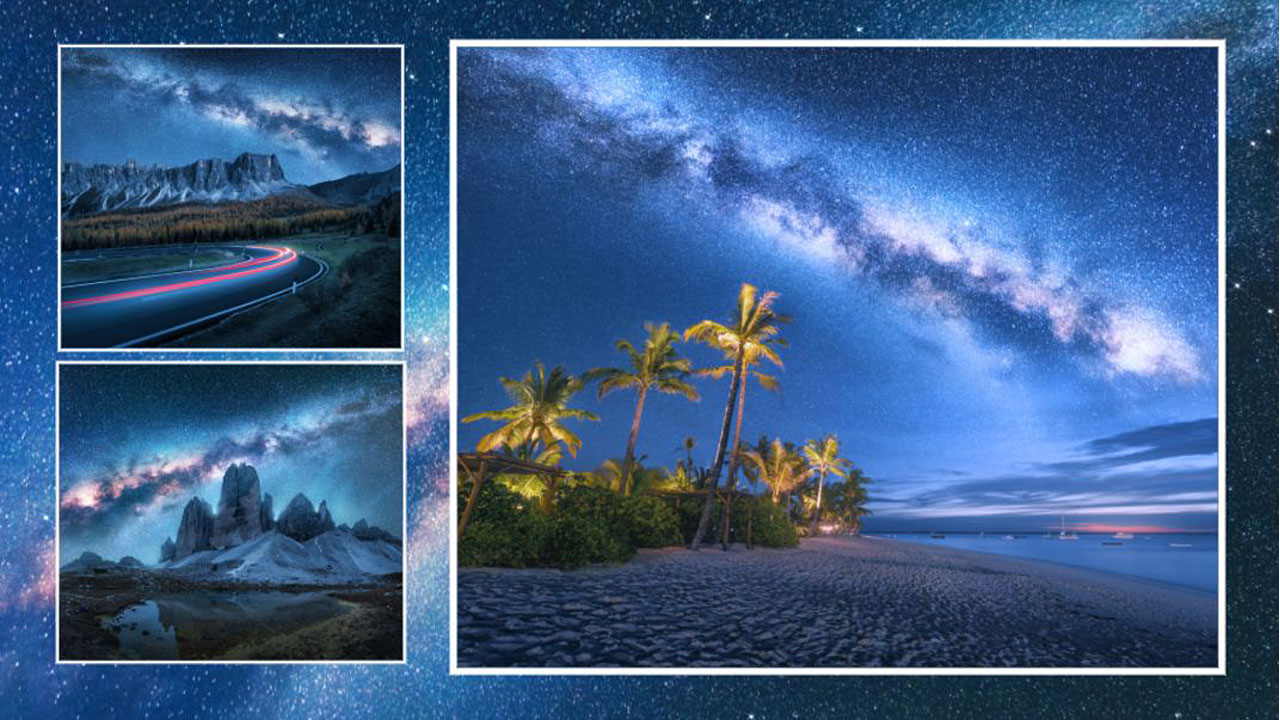
Liked the video? Imagine you can do even better! You don’t need any super skills in photography or video making - just easy-to-use software. Instead of going for common programs like Windows Movie Maker and creating another boring video, try a different method - use slideshow software with animation effects.
Take a look at SmartSHOW 3D. It’s an easy-to-use slideshow maker that lets you mix pictures and videos. There are 600 templates & effects to play with and a built-in music collection with 200+ tracks to explore. Apply 3D animations, insert dynamic transitions and create collages within a few mouse clicks.
Try out all these features on your photos! Just click the button below to download the free trial version of SmartSHOW 3D:
Use SmartSHOW 3D to create your own slideshow of pictures of space. It won’t take much time - follow the easy steps below and nail this task in a few minutes!
How to Make a Space Slideshow With Ease
Ready? Here are the steps you need to follow:
Step 1. Drop In Space Pictures
Start SmartSHOW 3D. Decide whether you want to create a new project from scratch, or use a pre-made space slideshow theme. Stick with the first option if you have a lot of free time and feel creative vibes. Alternatively, pick a pre-designed theme in Slideshow in 5 Minutes and use it as a base.
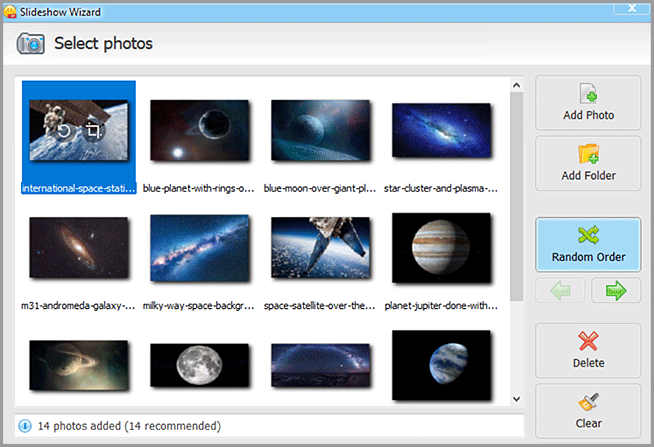
Now add your pictures. You can drop them one by one or throw in a whole folder. Looks a bit boring? With SmartSHOW 3D, you can add video clips to the Storyboard as well. Use them to break the silent stills: insert videos as single slides or as lively backgrounds for photos. Have lots of pics featuring one planet? Arrange them into collages. You can use a template to create collages automatically or combine them manually in the slide editor.
Need realistic photos of outer space for a scientific-like slideshow? Browse NASA space pictures to find suitable images.
Step 2. Apply Dynamic Effects
Make your space photos even more mesmerizing by applying animations to the slides. Go to the Animation tab and pick a preset you like. Drag and drop the chosen preset onto your image to make the photo gorgeously rotate in 3D, smoothly zoom in and out, dive in magical mist or transform into stylish collage. SmartSHOW 3D will animate the picture automatically, so just click Play and enjoy the stunning result.
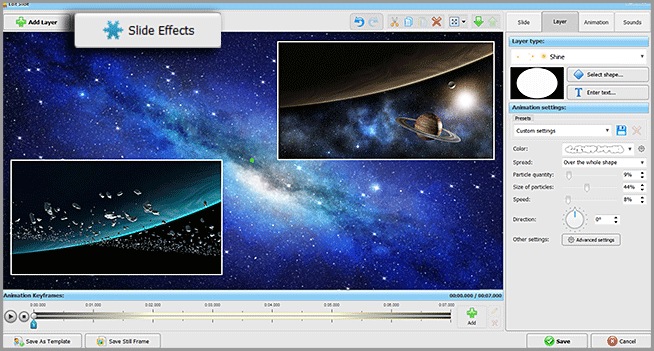
To keep the viewer’s attention, insert transitions between the slides. Switch to the Transitions tab and select a template that suits your project. If you have an educational slideshow, apply standard transitions. Your goal is to make a jaw-dropping video to please the eyes? Throw in some 3D transitions. Want to use only one type of transition? Select a preset and click Apply to All.
If you are making an educational slideshow with space pictures for kids, avoid applying too many effects. They will distract the children from learning new information.
Step 3. Insert Stylized Captions
Add interesting facts and scientific info about different planets and stars. Double-click a slide to open the editor, then click Add Layer > Text. Choose the style, then type in your text, adjust its size, select a suitable font and color. Position the text on the slide.
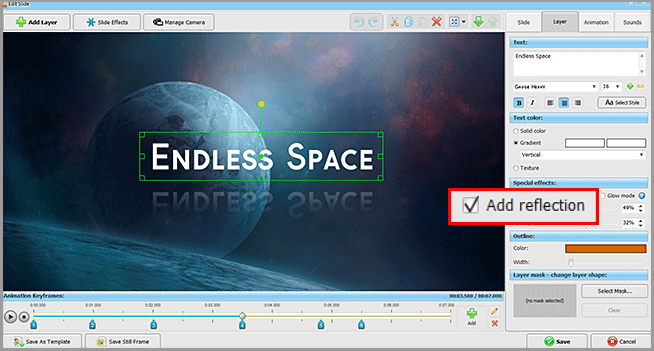
Apart from simple text, you can add animated, 3D and glowing captions. An animated text will be a perfect choice for swiping facts, while 3D and glowy captions will look absolutely cool as chapter titles.
If you make a space slideshow for kids, select the fonts that are easy to read and easy to spot. Don’t add too much text on the same slide - it’ll be too boring.
Step 4. Add “Spacy” & Catchy Music
Immerse your viewers into space journey even more with futuristic music. Choose from over 200 tracks of various genres: pop, rock, classical, jazz, etc. Fast-paced or medium-paced electronic music is the best choice for a space slideshow. You can add several songs and perform basic edits with them: cut, mix, adjust fade-ins.
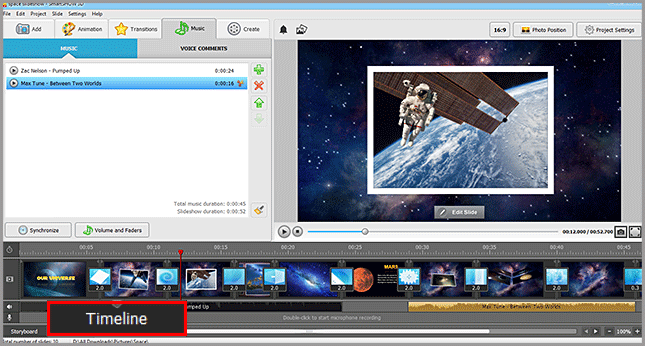
Can’t find music that suits your project? Look for songs about space on the Internet.
If you make an educational video, record voice comments to tell additional facts. Switch to the Voice Comments tab and click Record Voice. Your comments will be placed on the second track on the Timeline. You can cut and move the pieces, as well as adjust the fade-ins.
Step 5. Wrap Up Your Space Picture Slideshow
Think you are done with editing your slideshow? Go to the Create tab and click Create Video Slideshow. Select a format that fits your goals. If you want to watch the slideshow with your kids on a TV, pick Create Video For TV. Need to take your project with you to school? Pick HD Slideshow and then transfer it to a USB drive or a tablet.
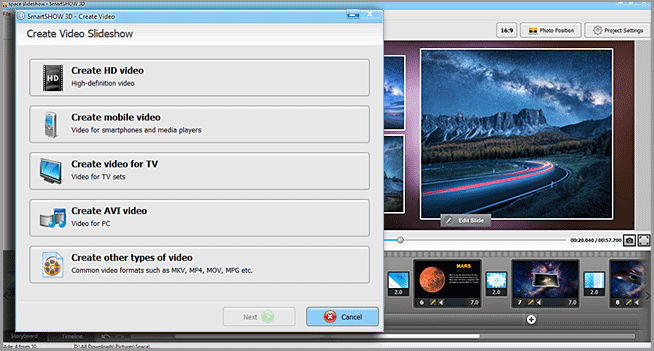
Now you know how to create a cool space slideshow. It’s pretty easy when you have all the pics, texts, music at hand, as well powerful software. Put this new knowledge into use and make a perfect slideshow right now!
Check out SmartSHOW 3D!


